Parasternal Short
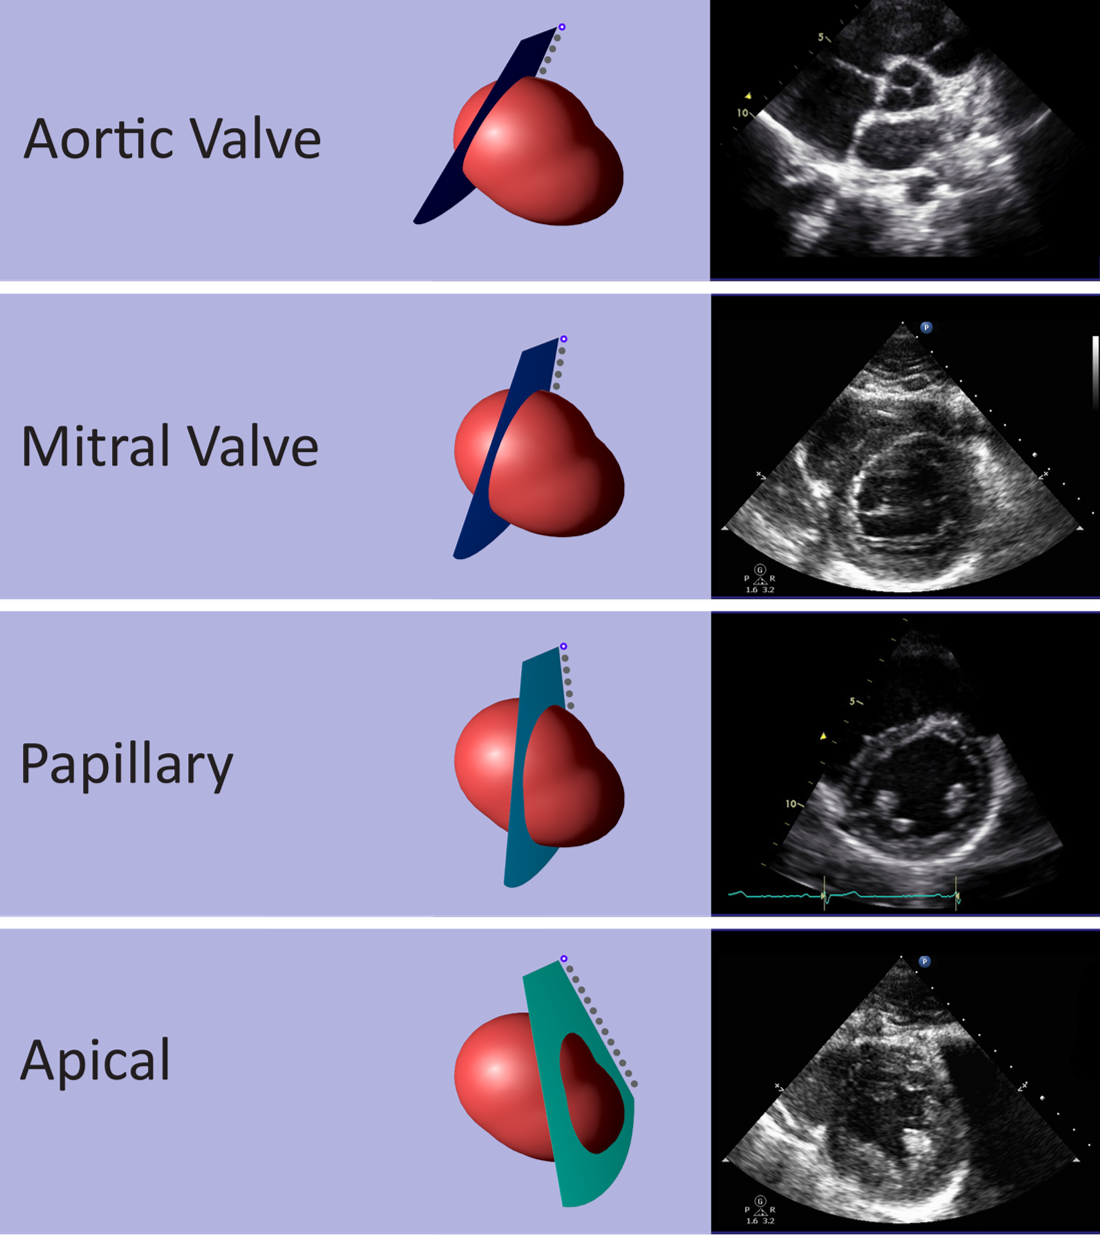
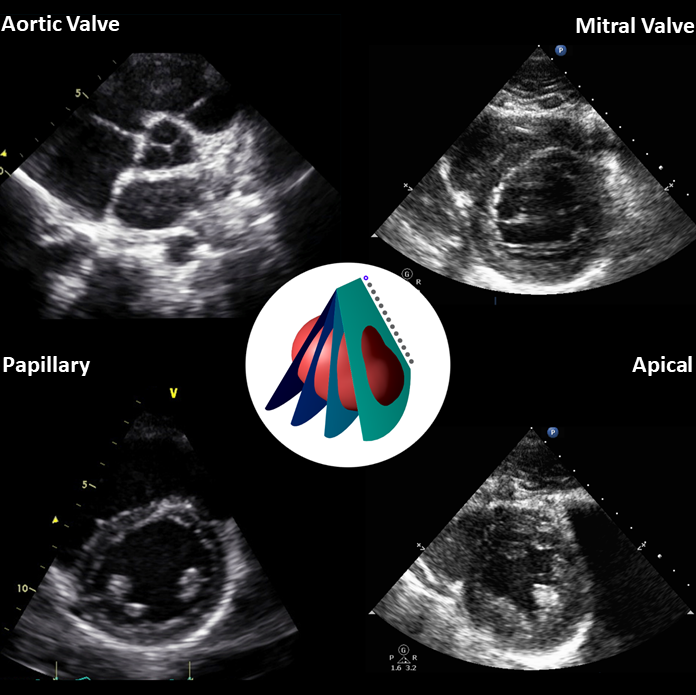
There are 4 levels in the parasternal long axis (PLA) the aortic valve (AV), mitral valve (MV), papillary and apex.
- Start at the parasternal long axis (PLA) rotate the transducer clockwise 90
- Then rotate from the 2-10 o’clock position until the indicator bisects the left clavicle
- By tilting the transducer base to the apex, obtain different short axis images
- Tilt/fan the transducer up towards the patients head until the centrally located AV comes into view
- Adjust until the AV appears a perfect quarter sized circle in the middle of the screen
- If the MV is seen first, tilt the transducer face slightly up to get the AV window
- From the AV tilt the transducer face down to open the mitral valve
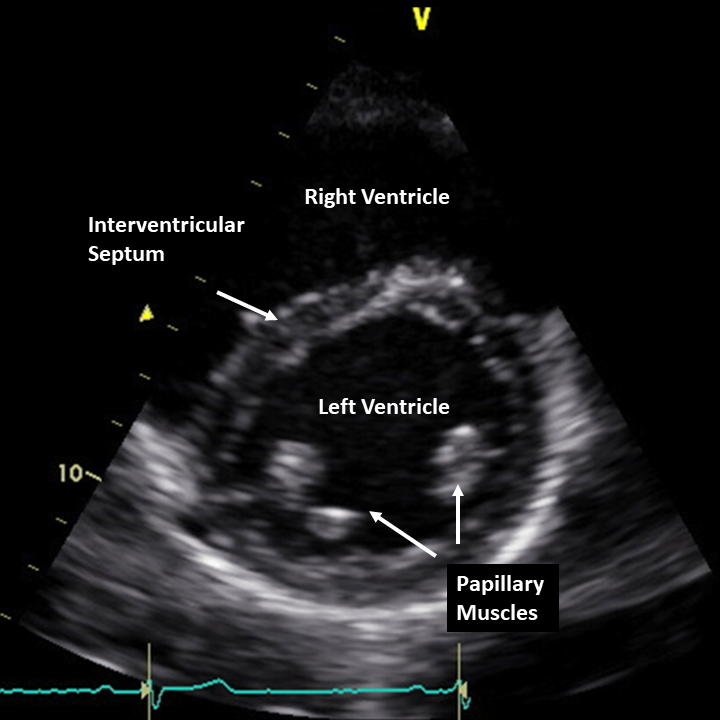
- From the MV tilt the face down until the round papillary muscles are seen
- Adjust the depth so that the LV fills about three quarters of the screen
- Continue to tilt the transducer down towards the patient’s feet to obtain an image of the tip of the LV
- AV function
- Peak Velocity Tricuspid jet
- Estimate pulmonary systolic artery pressure
- MV function
- Right ventricular function
- Right ventricular pressure and/or volume overload
- Septal flattening, D-shaped LV
- Apical dyskinesia
- Apical aneurysm
Some centers do apex to base, either is fine so long as it is systematic
Figure 1 - PSA Transducer Placement
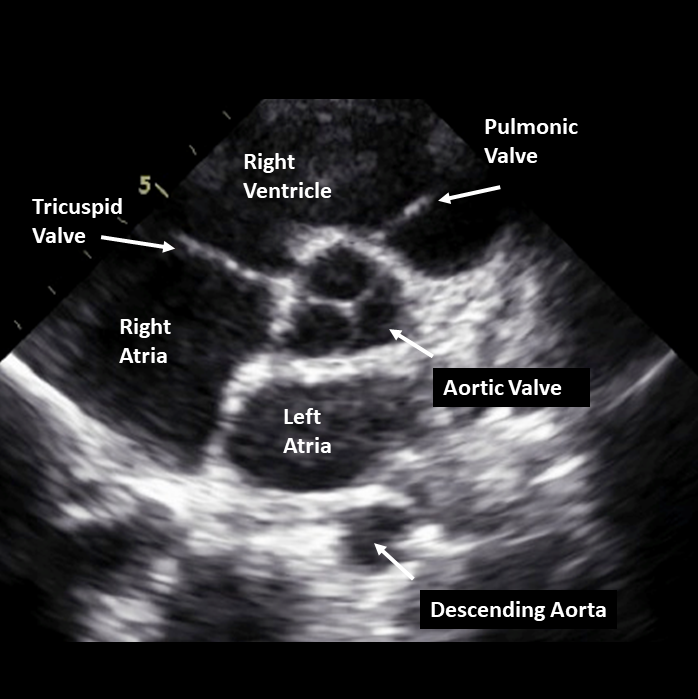
Figure 4 - PSA Ideal Aortic Valve Level
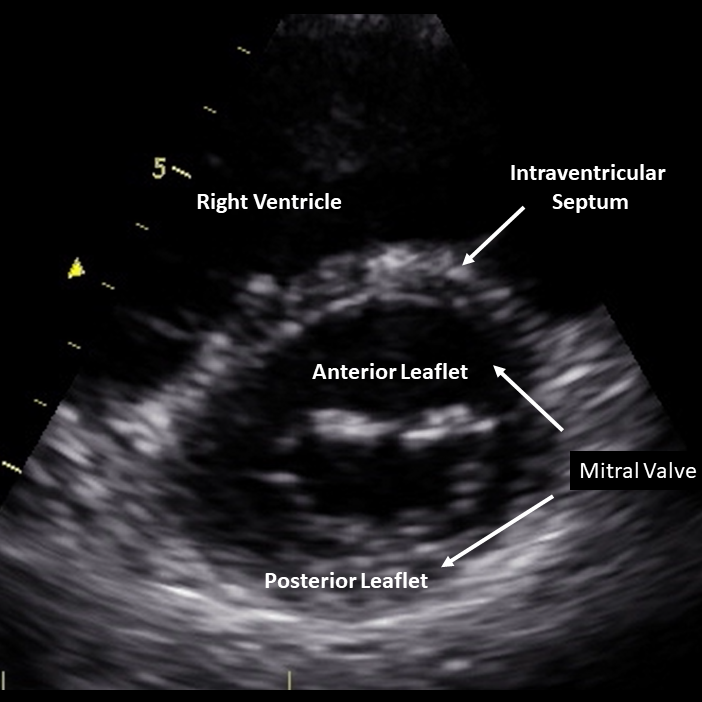
Figure 5 - PSA Ideal Mitral Valve Level